
It is possible to add images in Microsoft Power BI. For example, you can add a company logo or other icons to a dashboard. Did you know that it is also possible to add dynamic images? This way, certain images are displayed depending on a filter value. Want to know how to add dynamic images in Power BI? Then read this article.
1. URL of the images
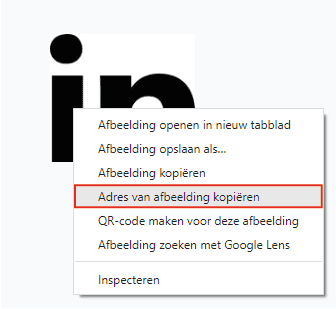
To use dynamic images, it is important that the images are hosted on the internet. Power BI uses a URL to retrieve the image. To get that URL, you need to copy the address of the image. You do this by searching for the image on the internet and then right-clicking and selecting ‘Copy image address’.
In this example, we use images from social media. We recommend creating a table in Excel where you put the name and URL of the image. The name is important to apply a filter on it in Power BI.

Save the Excel file somewhere so you can proceed to the next step.
2. Adding dynamic images in Power BI
This step starts by linking the Excel file from the previous step to the dashboard. Want to know how to do this if the Excel file is in OneDrive? You can read about it here. Once the table is imported, a visual must be added to display the images. Power BI does not have a standard visual for this. Click on the three dots at the bottom of ‘Visualizations’ and select ‘Get more visuals’.
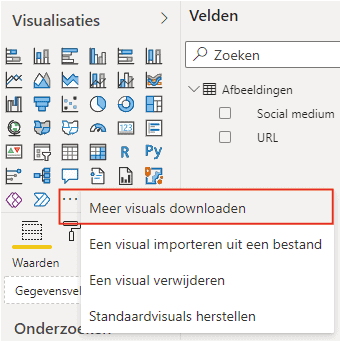
Then search for ‘Image’ to find visuals that can display images. In this example, we use the ‘Simple Image’ visual. Add it to the dashboard and provide the input with the column from the table containing the image URLs. You can easily adjust the image size by resizing the visual box. Using a filter makes it possible to change the image, as shown below.

Hopefully, you have also succeeded in creating dynamic images in Power BI. Curious about other articles in our knowledge base? For example, read here how to add a date table in Power BI. If you have questions, feel free to contact us.